Saturday, December 24, 2011

Merry Christmas! and what's on deck?


It is Christmas Eve and Santa has been to our house :o)

We all got really cool stuff and are pleased with the loot for this year.

One gift I received myself was a new Kindle! I am an avid reader and this I think will prove to be an awesome addition to my library.

Only one problem--what to store the thing in so it does not get damaged!!!

A quick internet search has given me my answer.

So, my new "up on deck" project will be this kindle cover! now to shop for the fabric :o) Happy Sewing!


Friday, December 23, 2011

What I'm up to

I have been one busy quilter! I completed this double irish chain wall hanging in record time..about 2 weeks! that is shopping, cutting, piecing, sewing, basting, and hand quilting! phew!


I just love the look of this quilt--and look at that, all those little squares began as 2 inch blocks! This one also has the cool tag that I printed at home with freezer paper and my printer. And this wall hanging also has a hanging sleeve on the back that was really easy to do. While not my original idea the sleeve instructions can be found online here. (much easier than I ever thought though!)


I love to hand quilt and since this wall hanging is for my mom for christmas I chose to use a heart stencil purchased at Joann's (with a coupon even :o))


A follow up how to post will come soon to show how you too can make this block. Happy sewing!


How cool is this!!

Today is a great day! after days of searching I have finally found the BOM (block of the month) quilt that I will do for the 2012 year! Mimi's Bloomers.


*usually one would put a pic here to show and tell but it is not mine to share. But I will post my finished work as soon as I have some to show :o) promise!


This quilt was designed and being offered by Erin Russek over at One Piece at a Time. And she can, like many people these days, be found on facebook at One Piece at a time quilts. check it out and like her stuff, I did!


On a personal note, this quilt may be a challege for me--it is an applique style and I have never completed a quilt in this style--but hey no time like the present to learn!


So far I have only seen the large center block--I just now sent away for the pattern and instructions. I just can't wait for it to get here! and can't wait for the monthly blocks to become available. Happy sewing :o)


Friday, October 14, 2011

So Far Behind

I am so far behind in my sewing this month it is overwhelming!!

AND I have lost my rechargeable battery for my camera.

So tonight I will be purchase a "regular" one just to post some pics of what I'm up to.

Don't you find blogs without pictures to be kinda boring?? I do!

Thursday, October 13, 2011

Lazy lazy blogger!

Here I am again--finally! I have been a very very lazy blogger.

I have many many excuses--but who really needs to hear more excuses! not me!

but putting all that aside--I have awesome sewing news to share!

I am so excited to report and share that a really cool sew-a-long is planned to go on over on so many really cool blogs. I have placed a button on the right side of my blog for you to follow along with me.

Quilt Dad

The plan is to complete 2 blocks a week created and posted by various bloggers.

The start date is not until Monday Janurary 24th and the first block up is from Quilt dad.

Check out all the fun here and I hope to hear from you and see all of your wonderful blocks in the Flickr group!

Happy sewing!

Tuesday, June 7, 2011

update...

Well it has been some time since my last blog post...I HAVE been a busy girl getting lots of stuff done, BUT I had a dead battery in my camera and was unable to take and upload pics! So now I have fixed that problem and am now camera ready :o)

So today I did not get any sewing done. However, me and little Miss where able to get some YUMMY rainbow cupcakes made!

I counted this bit of work as credit for her towards school time today. She helped me count out the 3 eggs we needed, fill the measuring cup with 1 cup of water and mix drops of food coloring precisely to get all 6 colors of the rainbow. Then we placed the colors in rainbow order into the cupcake wrappers.


We found this idea in Family Fun Magazine--a really great source for fun stuff to do with the kiddos!

Basically it is a store bought cake mix (anyone know of a good home made white cake mix--please share!) that you separate into 6 bowls. You then dye the batter to match the colors in the rainbow. And with the help of my 4 year old--little Miss-- we spooned a dollop or two per color into the cupcake wrappers then placed them in the oven. Bake at the temp and time that your box mix calls for and walla!

Oh, and that super creamy homemade frosting is a recipe that was passed on to me by a cousin from her MIL--it is super easy and oh so yummy too!

Maybe tomorrow will grant me some sewing time??? one can hope! :o) !!!

Thursday, May 19, 2011

Quilting Book Club post--Quilt top #1 all sewn up!

And here it is: Quilt top #1 all sewn up and ready for the sandwich stack and quilting. I went a little off script on this one. The directions given did not show off my selected fabrics well so I opted to go a different direction and am very pleased with the results!


I have been thinking about how to quilt this quilt for a few days now. Not sure how that will go...machine quilt? hand quilt? hand quilt with plain hand quilting thread? go for the show effect and try my hand at hand quilting with pearl cotton? not sure what way I will go but I do know it will be next week when I need to have this decided by...more on this project later :o)
Happy sewing!

Sunday, May 15, 2011

Quilting Book Club post #2

I am off to a better start. I got the book, did my shopping, and have cut and sewn the blocks together!
 With my pile of 30 blocks ready to go I am now on track to complete this quilt top with the rest of the group :o)

Next we get to sew up the quilt top --displaying the interesting zig zag-- that with proper block position will show a very interesting design! I am so excited!

Want to join me in making this quilt? go on over and check out the club.

Friday, May 13, 2011

Quilters Book Club post #1: Quilt Basic Ease

Well I just got my shopping done and managed to cut out what I need for this quilt...sort of..I made a real rookie mistake and cut a strip 5 1/2 inches and not the needed 6 1/2..UGH back to the store we will go!

But for now here is my fabric selections for this quilt. I would love to do one of those nifty type on the picture moves but I have not gotten to that part of my dummies book so for now I will have to describe.

so from the top down...#1 pink is for the light,#2 poka dot is for the medium, and #3 the jumble up circle flower one is the dark. 4th in the stack is for the binding and finally the dragon fly blue is for the backing.

I am so excited to see how these crazy colors come together but what ever it is I know I will love it forever!

I have cut the strips and sewn what I can, even made one sneak peak block.

here it is my first block and only 30 more to go! I took the pic this evening indoors and the lighting stinks!

I have my box to make the photo stage thing to get better quality pics--yet another WIP! but in real life the colors are WAY more vibrant!

And the final layout will be a Topsy Turvey array of this same block...hopefully tomorrow I will get to post and share my finished quilt top! cross your fingers! :o)

The times are a changing...so's my blog

It's been quite a while since last  I blogged, summer travels will do that to a gal :o) but here I am!

I am still reading up on the ins and outs of blogging with my library book, blogging for dummies. Still not hip on the name of the book but the information is sound.

But I wanted to share the fact that I am a crazy woman and have added another WIP (work in progress) to my never ending things to create!

I am really excited about this though--kidding aside. I have joined a sew along of sorts over at the Quilting Book Club. Here I will attempt to create a quilt a month!!!! A gal just can't have too many comfy quilts around!

So far I have purchased the required book: Modern Basics by Amy Ellis from Amazon.com .
The first quilt the club is working on is titled Basic Ease and tonight I will be fabric shopping--don't have enough in the stash and what I do have I have used so many times I am kinda sick of it right now :o).
The weather predicted for my area is rain this weekend (for now) so my plan is to get caught up on this one...more to come...happy sewing!

Monday, April 18, 2011

I need more information please!

Blogging I find is quite fun! but I do not have enough blogging technical knowledge to make the kind of blog and blog posts that I like to see.

So today I took a trip to the library and got some answers.


 While I am not a fan of Dummies books--I guess their information is right on, but I am not into the name--Dummies--the name has implications I am just not comfortable with--any how...now armed with some new knowledge I will hopefully be supplying this blog with prettier posts and flashy technology--one can hope :o)

Home School find!

I like to search the web for interesting ideas and crafts to do with the kids for school and am ready to share one of my finds now :o)

So a while back I found a very cute blog (Home School creations) that has very fun preschool printables for free! I have even subscribed to her blog in google reader (don't you just love google reader--if you don't know what I am talking about you should! check it out www.google.com/reader

so today while reading up my reader posts I saw she had posted a new bird preschool pack on her blog.

This preschool pack is a collaboration with another lady named Carisa.  I am not familiar with her work but I have printed her pack and will check it out...but looks cute so far!

I am very familiar with Jolanthe's stuff and we (me and Sophie especially) love it!

Last week we did the robot preschool pack and it was full of fun learning activities--even though she is a girl Sophie was tickled to do the robot stuff. Roger was in on the action too, even though he is way beyond preschool work, but it was nice to allow him to delve in and have fun!

My strategy for these packs is this.
1. I print out all the pages in the pack (unfortunately right now I just have a black and white printer so the ones that deal with color have to be hand colored (great coloring practice!)
2. I divide the pages into groups based their ability to be combined then place wrong sides together .
3. I place the pages into a laminating envelope and heat set it. this gives a double sided page. Some pages will not work this way, those I keep separate and laminate in a page on its own.
4. once the pages are laminated I hand over to Sophie and arm her with a bunch of dry erase pens and she goes to town!

for now we have the Robot pack printed and laminated and in use:

Roger oversees as Sophie practices her penmanship skills on a Robot activity page

soon we will have the bird pack going, so exciting! check it out and let me know what you think!


What's the number?

Today the kids and I are working on some number fun. We have created a nice chart for filling in number of various languages.

They already know how to say these numbers, now they need to spell them and this little worksheet is going to do the trick!

on one side we have the cardinal numbers listed and the answers to what's the number for each of the languages we are currently interested in.

On the back is a chart for filling in to aid memorization.

I printed out the two pages and have laminated them wrongs sides together. We use dry erase pens --just love these things! :o) to write and rewrite our numbers.

Page one:


Cardinal
Number
English
Latin
Roman
German
French
Spanish
1
One
Unus
I
Eins
Un
Uno
2
Two
Duo
II
Zwei
Deux
Dos
3
Three
Tres
III
Drei
Trios
Tres
4
Four
Quattuor
IV
vier
Quatre
Cuatro
5
Five
Quinque
V
Fünf
Cinq
Cinco
6
Six
Sex
VI
Sechs
Six
Sies
7
Seven
Septem
VII
Sieben
Sept
Siete
8
Eight
Octo
VIII
Acht
Huit
Ocho
9
Nine
Novem
IX
Neun
Neuf
Nueve
10
ten
decem
X
zehn
dix
Diez


Cardinal numbers: counting numbers. Answers how many?
Ordinal numbers: tells in what order. First, second, third, etc.
Nominal numbers: don’t show number of or order. They are numbers we use to identigy things. A telephone number, a jersey number (sports) a zip code.
Page 2:


Cardinal number
Language:_____________________________________


Hope you enjoy this homeschool source!

Wednesday, April 6, 2011

Super Mario Guys here we go!

My sons, like many boys of their generation just love, love, love anything Mario Brothers related.

So a few nights ago I was online just surfing and observing looking for inspiration when I ran into this most awesome site that has free Super Mario Brothers cross-stitch patterns :o)

The featuring blog is so interestingly titled Gatchastitch--and if you know me personally you know what an interesting coincidence this name is!

anywho--I printed out my patterns and went to the cross-stitch bucket and pulled out most of the necessary colors. Do you believe I still do not have EVERY color DMC carries, ha, me neither! shocking!

My youngest sons favorite right now is Luigi so that is where I started. I cross-stitched the night away until I had my image almost done. will need to go shopping to finish.

I had the cross-stitch done and thought OK so now what to do with this adorable little sprite???

well one of my favorite classic quilt squares right now is the sawtooth square. I decided to pair my sons favorite guy with my favorite block we have this beauty:
let'sa go! Luigi is in the race!

I did have to make some unhappy adjustments. I needed my Aida cloth to be 4.5 inches, but I had on hand only 4 inch squares (cut for a Christmas ornament project that never got done) so I have made do with what is on hand adding the cloth border to the adia cloth to increase its size to 4.5 inch square.

I will post a tutorial on making this sawtooth block soon! must take some pictures!

All in all I love the result. I have the Mario cross-stitch done (have some missing floss there too -ugh!) and have cut the sawtooth pieces and as soon as I am awake tomorrow that one will be all sewn up and added to this post!

updated April 7, 2011: ok  as promised I am updating and adding that most awesome pic of the completed Mario cross-stitch within the red sawtooth block:
Mario is my pal!
Oh and yes, I am planning on using appropriate color fabric too. Meaning that Luigi is always wearing green so you see the outside of the sawtooth is green.

His brother Mario is always in red, so the outside sawtooth fabric will be red.

Next up will be Toad, and he is always in white with red poka dots--this may prove to be a tricky find, but if I can't find it, white muslin and red fabric paint will help me make my own!

Right now my inspiration has only taken me to making the guys and gals into the simple quilt square where we go from here in still in that making....

updates to come--this is so exciting!!!

Saturday, April 2, 2011

My need for a BOM has been appeased!

I don't know why it is but I feel as if I just NEED to have a block of the month (BOM) project going.

The reality is I don't NEED it at all! I give myself plenty of opportunity to be creative and crafty and get stuff done. I guess it is the joiner in me that loves to do things on a schedule and know that there is something fun coming next month!

All this leads me to my newest (began in January actually) BOM for this year.

I found this particular BOM while surfing the web and devouring all the neat-O sewing blogs. Over at Little Miss Shabby I found the cutest BOM!

And I am hooked!

My version of the January block
If you want to sew along start here to get the supply list and images to print to make one for yourself, but below are my rules for this quilt.

So what I did, don't remember if this is the rule given on the site, but I selected 20 different fat quarters of fabric and cut them into 2.5 inch strips then cut those into 20-- 2.5 squares.

My personal rule is that each block will have the same random selection of the same 20 squares and that the floss colors will some how complement those pieces but not every block will have the same exact floss colors.

also the center block will be the same blue cotton fabric for each of the 12 month blocks. a re-use fabric from when Emma was Mary for All Saints Day at Church.

My version of the February block
I just loved the February block--maybe because it is my birth month and that is special or just the lovely love these two birdies are giving :o)
March is so rainbow-luscious!
this pic shows the 2.5 squares off well. again, no one fabric is ever repeated per month but the same 20 squares will be used each month in a random order. seems that some keep popping up next to each other, guess i just like some together ;o)
My April block all done up!
I am also sewing up the blank block the month before I need it.

So right now I have these 4 months done and am about to go pick up all the pre-cut pieces for next months and sew it up so that come the first all I have to do is print the embroidery image, tape that to a sunny window and trace (I use a #2 pencil--I know there are other ways but I don't mind the graphite--it'll wash and wear out eventually--and I am making this for me--not for competition or for sale).

What I love about this BOM is that the links are available on the first of each month. I know that is the general rule with BOM, but some blogs/websites have posted late and that is ok--I get that we all have busy lives, but I am so excited for the 1st of the month to come and a late block makes for a sad, sad sewer!

let me know what you think! happy sewing!!!!!

Thursday, March 31, 2011

Old project to share anew :o)

A while back I was following along on a month long journey called Celebrate the Boy that was featured on an awesome blog I follow called Made.

During this month long sewing extravaganza featuring all things boy I was inspired with a featured pattern to create a really cool wallet for my little monster (boy).

Check it out! he even has some cash and cards in it!
The original pattern and creator can be found here!

Let me know what you think!

The kid has got to create!

So tonight my lovely sunny has requested (begged :o) for me to make her some play dough-- right now!!...she just has to create.

so off to the world wide web I go to find an easy and fast play dough recipe for the child.

and boy did I find it! check out this most awesome site! it is chock full of wonderful recipes for all manner of play dough!

tonight we sampled the cream of tartar play dough and it was fun and easy! and the bonus came when my 7 year old told me that he liked this kind better than the 'regular' kind--kooddos for the homemade cheap stuff!
gather ingredients and dump em in a pan and cook it up!

Wednesday, March 30, 2011

A Yoopers Delight!

It is a fact that within the USA there are locations that have a type of person that we give a funny name to. We have such a term here in Michigan.

Our state is made up of two peninsulas, an upper and a lower. And we have a term for those guys 'up north' we call em Yoopers. and they have all kinds of facts and stereo types about them.

One fact about them is a style of food that was made popular years ago when the cooper mines were in operation. This food is called a pasty and they are this really delicious bread pie you can hold in your hand and enjoy--sorta like a sandwich.

My husbands family are these such people and we do love your pasty's!

So last week while at lunch at my in-laws house, my brood was treated to a very sneaky sorta pasty--not a real pasty but a knock off that is still quite delicious! and I am going to share this simple treat with you! :o)

first we gather our ingredients:

a bit of flour, a pound of ground beef, an onion diced up to how you like it, some cheese--any hard yellow cheese will do, a package of store bought ready-made 8 count biscuits and a rolling pin. first we chop the onion--I kinda minced mine because my family is not onion friendly.

I began frying the beef a bit, drained off some of the fat then added the onion and cooked until the beef is browned.
next I opened up the biscuit package and with a lightly floured surface I rolled out the biscuit then topped with the cooked beef/onion mix and added my cheese.
I smooshed it all together into a pizza pocket like shape. *if you use too much flower just add some water to your finger and smear along the edge-this will help "glue" the edges shut.
ta da! now repeat for a total of 8 fake pasty pies.

place them on an ungreesed cookie sheet in a 350 degree oven for about 14 minutes. Keep an eye on them cause ovens vary. you are looking for the dough to brown because the meat inside is already cooked--and cheese melts easy!
YUMMIE! we top ours with a bit of ketchup and dig in!

Hope you like this feast and much as we do! now go dig in!

Sunday, March 27, 2011

Work in Progress: Grandma's Flower Garden Quilt

Well here it is. I have had this quilt in process --making some progress for the last 10 years or so. It's been pulled out and put away so many times I really don't recall when I actually began working on it.
this type of sewing employs the English paper piecing method

I got the original plans from a long time friend, Anne, and have had some design changes along the way.

The real beauty of a quilt of this kind is you can do it anywhere--a great time killer while otherwise waiting for something else to happen (i.e. in the doctors waiting room).

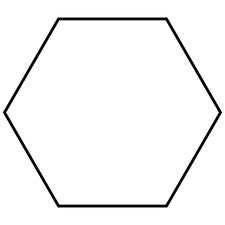
The design is really simple. First take a hexagon (a shape that has 6 equal sides)

use this shape to make yourself a handy template.

print it out and glue to a piece of cardboard (I used an old cereal box) or quilters stencil plastic. The size hexagon you start with is relative to the size flower you intend to make. Meaning, you don't have to have a specific size to start with, only once you have the size you MUST keep that size for each "petal" for the entire quilt!

but size does matter a bit right?. if you make a 3 inch hexagon template you are gunna get a really big flower.

My quilt is made up of hexagons of about 1.5 inches. so if you measure from the top to the bottom along the center it is 1.5 inches. If you want to make yours bigger go for it, just remember that all the paper pieces must be the same size.

so I made my cardboard pattern. I then took plain copy paper from the recycling bin and folded it accordion style so that the entire card board piece fit with some room around each side--cutting to close to the folded edge will result in a connected line of hexagons--not what we want, here we want to cut many but have them all individual pieces so make sure you have some room to ensure each hexagon will be an individual :o)

I then set my cardboard piece on top of this and traced around with a pencil as many hexagons as would fit on the folded page (keep the page folded to cut multiples at one time). I then cut out the paper pieces.

then I took my desired color of fabric and did the same accordion fold but this time I cut the hexagon out with a 1/4 inch seam allowance along each of the six sides. you  could also make another cardboard template to accommodate the seam allowance, but I just eyeballed the 1/4 inch and it worked well for me.

This 1/4 inch will end up being the seam allowance.

so to plan what to cut you will need 19 paper pieces per flower. one center piece, 6 first row and 12 second row then 18 white for the flowers that need them.

the amount of fabric you need for each flower will be determined by how big your petal is..but this is a great stash buster quilt. As you can see from my pics I only use each print one time--never repeating any fabric.

you start with the center hexagon. I kept this a uniform color for the entire quilt. My Grandmother (Fannie) had given me an old yellow sheet she no longer needed and I chose that for my quilt center. pretty sentimental now that she is in heaven ♥.

To make the center and petals I took one paper pattern and one fabric piece-- placing the paper to the wrong side of the fabric and folded it over one side 1/4 inch and put a basting stitch in and continued turning the seam allowance down and basting until I had the fabric completely covering the paper hexagon. this technique I am told is called English paper piecing.

I did this technique and made up a flower group, one center, 6 first row petals, and 12 second row petals.

then beginning with the flower center (yellow in my case) and one first row petal, I put them right sides together and whip stitched one of the six sides. tied my thread in a simple knot and cut my thread. re knotted my thread and got first row petal number two ready. sat everything in front of me with rights sides up, lined up the second first row petal put right sides together and whip stitched this one on, you will have to do some funny turning on this one, but keep laying the flower down to ensure the correct sides of the hexagon are being whip stitched together.

*sorry I don't know how to do videos at this point--I know that would be really helpful right!

Also you will not be able to sew the petals all on without tying off and starting a new knotted thread.

when the flower was done I repeated the steps to add the white border on some flowers...as you can see in this picture above I first decided to have 2 rows of white, but once I had about 20 flowers all sewn up--I hated it! so now I am ripping and restitching to get just one row of white and I like this new look a lot!

I have made this quilt to have 9 rows of 9...but a little clarification on that...since we are not sewing with flat squares we need to do some adjusting to make the rows even. To do this I made my first row 9 solid flowers, my next row is 8 sold flowers with 1/2 flowers on the top of bottom of each row.

another tip. if you plan to make up a bunch of flowers first then sew them together to form the quilt top, make sure you pay attention to those white hexagons. if A has them, B will not, but C will need them. Just take a long look at my in process quilt and I am sure you will see what I mean.

So my plan at this point is to have 9 rows by 9 rows, which in my estimation will amply fill the top of my king size bed.

and just a note of clarification--the paper pieces will need to be removed before you create the quilt sandwich and quilt it up. So my tip is to cut many hexagon paper shapes and reuse them. So I cut out enough paper templates to make 8 flowers then removed the interior papers and used to make more flowers. this way you will not end up with an entire quilt of paper templates to rip out in the end! ☺

I got lots of work to do!

I hope this post helps inspire many to attempt this quilt, if you have any questions or suggestions please send me a note and I will help clear things up! happy sewing :o)